Tuesday 13 December 2022

Video Embed using Embed webpart in SharePoint Online Modern Page

Recently our client provided us company anniversary video and asked us if we could add it to SharePoint online site and showcase the result. So, I thought about what the options available are. And I am writing this blog to showcase the options available and their advantages and limitations. Let’s see the options first:

If you want to check any previous options, you can click on that option in the above list and read more about that option.​

You can use this webpart to embed your video without having issues with the source. It provides you the option to embed iframe which allows you to embed any kind of video. 


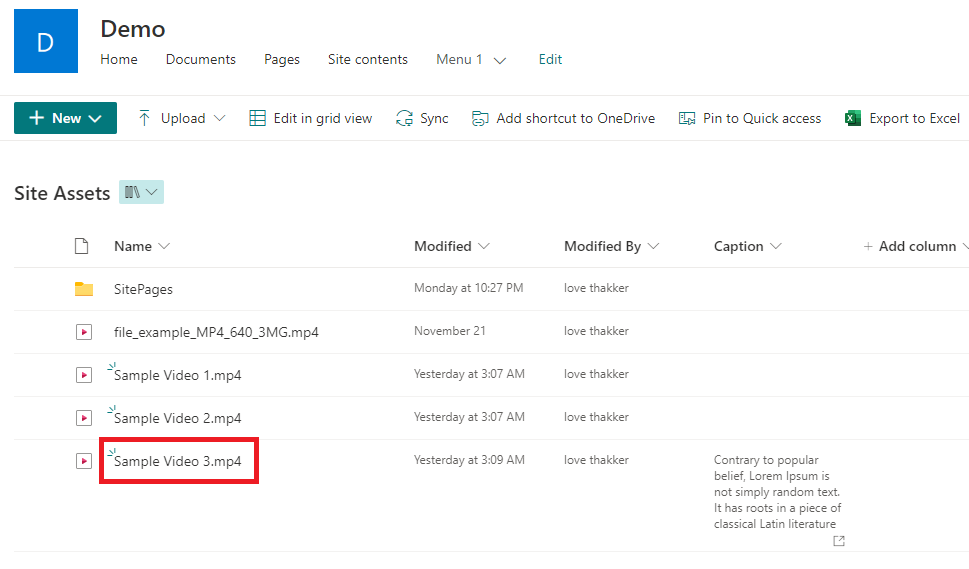
  • Step 1. For this blog, I will use the SharePoint Library video and we will use the iframe option to view the video on the Embed webpart. To start the process, upload videos in the SharePoint library. 

    Note - If you want to embed any other source video just add the source path below and jump to step 7.
     <iframe src=" " width="640" height="360" frameborder="0" scrolling="no" allowfullscreen></iframe>  
    
  • Step 2. Once added, click on the file. It will open in the preview. 


  • Step 3. Click on three dots (…). In that click on Embed.


  • Step 4. This will open the embed panel. 


  • Step 5. You can change the below configuration as per your requirements:
    • Start time – you can select the start time for your video to pay
    • Player size – there are multiple sizes available for your embed option – 560 x 315, 640 x 360, 853 x 480, 1280 x 720. 
    • Autoplay – select if you want to start your video automatically.
    • Responsive – this will generate responsive code for the embed. This will use the player size you have selected for responsiveness. 
    • Show title – Enable this to show your video title on the video.


  • Step 6.    Once we select the correct settings, click on the “Copy embed code” button and it will copy the embed code. 


  • Step 7.    Now go to your modern page and add Embed webpart.


  • Step 8.    It will open the embed panel automatically. If not, click on “Add embed code” to open the embed panel.


  • Step 9.    In the embed code box, provide the video iframe we copied earlier.


  • Step 10. Provide a caption for the video if you want. 


  • Step 11. Save the page. 


  • Step 12. The video will render as below.


Advantage:

  • You can have video public or private. Video is available to all users if it is from any video streaming source like YouTube, or Dailymotion. If you are embedding from Office sources, you can implement permissions as well. 
  • The video takes full section width.
  • Video provides you with expected functionality like showing thumbnails and providing a play icon. When you click a play icon the video starts.
  • You can provide a multiline caption below the video. 

Limitations:

  • There are no additional details you can showcase with the video.
  • We have seen this issue sometime that even though we disabled autostart, the video autostarts on the page load.
  • On page load, instead of the play icon, you may see the embed icon. When you hover over the video, it disappears and when you move your cursor out of the video, you will see the play icon. This behavior generally happens if you embed the video from an external source like youtube.


Monday 12 December 2022

Video Embed using File Viewer webpart in SharePoint Online Modern Page

Recently our client provided us company anniversary video and asked us if we could add it to SharePoint online site and showcase the result. So, I thought about what the options available are. And I am writing this blog to showcase the options available and their advantages and limitations. Let’s see the options first:

If you want to check any previous options, you can click on that option in the above list and read more about that option. Let's see how we can use the File Viewer webpart in detail:

This is the new alternative for Stream (Classic). With that going out of the picture you need to store the videos in your OneDrive, SharePoint, or Yammer.  Once you move your video to one of those places, then you can use this option for embedding a single video on your modern page. 

  • For this blog, we will add the video to the documents library. 

 
  • Now add the File Viewer webpart to your page.


  • It will open the file select panel. If it doesn’t open, click add file in webpart.
 

  • In the open panel, click on site. Select the library.


  • Select the video file. Then click select. This will load the video on the page.

  • Provide a caption/ description for the video if you want.

  • Save the page. 

  • The video will render as below.

Advantage:

  • No need to copy the video link. You can select the video directly. 
  • Video is available to any user who has access to the file. If you want to manage permission, that can be done using SharePoint’s permission management. 
  • The video takes full section width.
  • Video provides you with expected functionality like showing thumbnails and providing a play icon. On the play icon click, and the video starts.
  • Caption/ description allows multiple lines of text content. 

Limitations:

  • The file select option is not showing classic libraries like site assets to select a video. So, avoid creating such a library to manage videos.
  • We can’t display any additional metadata associated with the video even though now we are using SharePoint as storage. 


Sunday 11 December 2022

Video Embed using YouTube webpart in SharePoint Online Modern Page

 Recently our client provided us company anniversary video and asked us if we could add it to SharePoint online site and showcase the result. So, I thought about what the options available are. And I am writing this blog to showcase the options available and their advantages and limitations. Let’s see the options first:

Let's see how we can use the YouTube webpart in detail:

YouTube is an open source for most companies for sharing content. If the video can be shared publicly, you can use this option.

  • Step 1 - Once you upload & publish the video to YouTube, copy the video URL.


  • Step 2 - Now add the YouTube webpart to the modern page.


  • Step 3 - In settings, provide the video URL.


  • Step 4 - Once the video is loaded, the remaining options will be enabled. You can set the start time, set if you want to show controls, etc.


  • Step 5 - You can provide a caption below the video if you want.


  • Step 6 - Save the page.


  • Step 7 - The video will render as below:

Advantage:

  • Video is available to all users.
  • The video takes full section width.
  • Video provides
    you with expected functionality like showing thumbnails and providing a play icon. On the play icon click, and the video starts.
  • You can provide multiline captions below the video.
  • When you add a video to the YouTube Channel, you can provide custom thumbnails and subtitle details.

Limitations:

  • If the video is private, this option might not be available for you. Also, there is no permission control for this webpart.
  • YouTube owns all rights to the source. For any reason, there is conflict, YouTube can block your video, and this might break the webpart.
  • There are no additional details you can showcase with the video. For example, like or comment count. 

Saturday 10 December 2022

Video Embed using Stream Classic webpart in SharePoint Online Modern Page

Recently our client provided us company anniversary video and ask us if we can add it to SharePoint online site and showcase the result. So, I thought about what the options available are. And I am writing this blog to showcase the different options available and what are their advantage and limitations. Let’s see the options first:

  • Stream (Classic) - This Blog
  • YouTube
  • File Viewer
  • Embed
  • Hero
  • Highlighted Content

For this blog, we will see the first option - Stream (classic).

You can use this option if you are using Microsoft Stream in your organization.

  • Step 1 - You can upload the video to your organization's channel or private channel. Once you added your video in Stream, copy the video URL.


  • Step 2 - Then, you can add Stream (Classic) webpart on your modern page.


  • Step 3 - In settings, please select a single video and provide the video URL we have copied in step 1.


  • Step 4 - You can provide a caption below the video if you want.
  • Step 5 - Save the page.


  • Step 6 - The video will render on the page as below.


Advantage:

  • The webpart provides expected functionality like showing a thumbnail of the video and the play button and on the play button click it will start the video.
  • The caption is allowing multiline text.
  • There is a setting available for starting the video at any specific time.
  • When you play the video, you can view the statistics of the video like the number of views, number of likes, number of comments, etc.
  • The videos are stored in a central area. If you want to create a video gallery kind of functionality, then this webpart will be more useful.
  • Stream video is permission oriented. So, if the user doesn’t have permission, they won’t be able to see the video.
  • When you add a video to the stream, you can provide custom thumbnails and transcript details.

Limitations:

  • If you are adding this in a single-column section, this will not use full screen.
  • Stream requires a license. So, the video is not visible to users who don’t have a stream license available. If your Intranet is shared with such users, please avoid this option.
  • The stream video option is not able to showcase any metadata associated with the video. For example, if you want to see the video description, this will not be shown. There is an option to add the caption manually.

With Stream (On SharePoint) coming up, this will be deprecated in the future. The estimate is in Q1 of 2023 the retirement date will be announced and after 24 months of the retirement date, this will no longer be available.

For more information refer below link:
https://learn.microsoft.com/en-us/stream/streamnew/stream-classic-to-new-migration-overview#timeline

Saturday 1 October 2022

Sync SharePoint 2019 Library to Local Folder

Hi. Recently I needed to implement FBA for a SharePoint 2019 Environment. But before implementing that, I needed to make sure to back up a few libraries from the site, so in case we mess things up, that data shouldn’t be affected. One way was to back up content DB for that web application but it was huge in size. As we require data from a couple of libraries, I thought why not use local folder integration and then copy files to other drives.

Issue

The classic option that worked in SharePoint 2013 of opening the library with file explorer shows enabled but stopped working in SharePoint 2019. It will showcase you a dialog for one drive sync client installation. If you allow the popup, the reference link provided at the end of the blog will open in a new tab.


Solution:
 
You have 2 options showcased on this page:

  • Solution 1 - Install the latest OneDrive client.
They have mentioned all the steps as well.
The issue I faced with this is that you need to login into OneDrive before use which requires Office 365 users. Even after connecting with my trial development account user, I was not able to make it sync to the local folder.

The issue can be anything like we didn’t have any patch installed in the server or the functionality requires both systems to have the same credentials. But as this is not my primary task, we decided to go with the second solution.


  • Solution 2 - Install the OneDrive Sync app
Note – the support for the OneDrive Sync app ended on January 11, 2011. So choose this approach carefully.

To install the previous OneDrive for Business sync app with Office 2013, follow these steps.

Note: If you have Office Professional Plus 2013, Office 365 Enterprise E3, Office 365 Midsize Business, or Office 365 Small Business Premium, then you already have the OneDrive sync app installed.

    • Uninstall any earlier versions of the previous OneDrive for Business sync app.
    • Select one of the installer links below to download the installer for your language and system edition. If the 32-bit or 64-bit edition of Office is already installed, you must select the same edition for OneDrive.


Language

32-bit download link

64-bit download link

Arabic

OneDrive for Business [32-bit]

OneDrive for Business [64-bit]

Bulgarian

OneDrive for Business [32-bit]

OneDrive for Business [64-bit]

Chinese (Simplified)

OneDrive for Business [32-bit]

OneDrive for Business [64-bit]

Chinese (Traditional)

OneDrive for Business [32-bit]

OneDrive for Business [64-bit]

Croatian

OneDrive for Business [32-bit]

OneDrive for Business [64-bit]

Czech

OneDrive for Business [32-bit]

OneDrive for Business [64-bit]

Danish

OneDrive for Business [32-bit]

OneDrive for Business [64-bit]

Dutch

OneDrive for Business [32-bit]

OneDrive for Business [64-bit]

English

OneDrive for Business [32-bit]

OneDrive for Business [64-bit]

Estonian

OneDrive for Business [32-bit]

OneDrive for Business [64-bit]

Finnish

OneDrive for Business [32-bit]

OneDrive for Business [64-bit]

French

OneDrive for Business [32-bit]

OneDrive for Business [64-bit]

German

OneDrive for Business [32-bit]

OneDrive for Business [64-bit]

Greek

OneDrive for Business [32-bit]

OneDrive for Business [64-bit]

Hebrew

OneDrive for Business [32-bit]

OneDrive for Business [64-bit]

Hindi

OneDrive for Business [32-bit]

OneDrive for Business [64-bit]

Hungarian

OneDrive for Business [32-bit]

OneDrive for Business [64-bit]

Indonesian

OneDrive for Business [32-bit]

OneDrive for Business [64-bit]

Italian

OneDrive for Business [32-bit]

OneDrive for Business [64-bit]

Japanese

OneDrive for Business [32-bit]

OneDrive for Business [64-bit]

Kazakh

OneDrive for Business [32-bit]

OneDrive for Business [64-bit]

Korean

OneDrive for Business [32-bit]

OneDrive for Business [64-bit]

Latvian

OneDrive for Business [32-bit]

OneDrive for Business [64-bit]

Lithuanian

OneDrive for Business [32-bit]

OneDrive for Business [64-bit]

Malay(Malaysia)

OneDrive for Business [32-bit]

OneDrive for Business [64-bit]

Norwegian(Bokmal)

OneDrive for Business [32-bit]

OneDrive for Business [64-bit]

Polish

OneDrive for Business [32-bit]

OneDrive for Business [64-bit]

Portuguese(Brazil)

OneDrive for Business [32-bit]

OneDrive for Business [64-bit]

Portuguese(Portugal)

OneDrive for Business [32-bit]

OneDrive for Business [64-bit]

Romanian

OneDrive for Business [32-bit]

OneDrive for Business [64-bit]

Russian

OneDrive for Business [32-bit]

OneDrive for Business [64-bit]

Serbian(Latin)

OneDrive for Business [32-bit]

OneDrive for Business [64-bit]

Slovak

OneDrive for Business [32-bit]

OneDrive for Business [64-bit]

Slovenian

OneDrive for Business [32-bit]

OneDrive for Business [64-bit]

Spanish

OneDrive for Business [32-bit]

OneDrive for Business [64-bit]

Swedish

OneDrive for Business [32-bit]

OneDrive for Business [64-bit]

Thai

OneDrive for Business [32-bit]

OneDrive for Business [64-bit]

Turkish

OneDrive for Business [32-bit]

OneDrive for Business [64-bit]

Ukrainian

OneDrive for Business [32-bit]

OneDrive for Business [64-bit]

Vietnamese

OneDrive for Business [32-bit]

OneDrive for Business [64-bit]

    • Run the downloaded file to start the Setup program.
    • Follow the instructions to complete the installation.
    • If you're asked to provide a license key, enter 3V9N8-W93CC-FQPB8-Y9WVF-TVGJ3.
    • Once the installation is complete, you can open the start menu and in that, you will see the “Microsoft Office 2013” folder. When you open it, you can view OneDrive for Business 2013.


    • When you open it, it will ask you to provide a URL to sync and a path where you can map your local drive folder.


    • Provide the URL and map the correct path and you will be able to sync your files to local folders.


I didn’t have permission to install the new patch on the server but if you do have then try to update the server and check if you can copy files using the OneDrive app in SharePoint 2019 first. If that doesn’t work, you can always perform the steps mentioned in solution 2.


Reference
  • https://docs.microsoft.com/en-us/onedrive/install-previous-sync-app?redirectSourcePath=%252fen-US%252farticle%252fhow-to-install-onedrive-for-business-for-sharepoint-and-sharepoint-online-37b3dddd-30af-4294-aba8-c290cea01b5d