Friday, 12 August 2022

Power Automate URL Changes

 Issue:

Recently I got a query from a citizen developer about a message showing on the Power Automate home page that whether they need to worry about this or not.


Generally, I am not used to reading the warnings posted by Microsoft on the home page of Power Platform applications but as this was a query, I needed to look into it, and I found out that this might not be much worry on the first reading.

Analysis:

As it suggests in the message as well, when you click on the “Learn More” link, you will read similar stuff that Microsoft is changing the URL of Power automate from “https://flow.micrsoft.com” to “https://make.powerautomate.com”.

Also, it is mentioned in the article that once the changes are done, Microsoft will route all the traffic requests to the new URL and users will be redirected to new URL. Though they suggest if they can update their bookmark, it would be useful to change it to a new URL.

Below are the new URL details provided by Microsoft:


#

Existing Power Automate URL

New Power Automate URL

1

*.flow.microsoft.com

*.powerautomate.com

2

flow.microsoft.com

make.powerautomate.com


For US Government Customers

1

gov.flow.microsoft.us

make.gov.powerautomate.us

2

high.flow.microsoft.us

make.high.powerautomate.us

3

flow.appsplatform.us

make.powerautomate.appsplatform.us


For China Customers

1

powerautomate.cn

make.powerautomate.cn


But then I read it twice more to understand the impact on a bigger scale and it is actually a big change. Let’s say you have an IT administrator who has added IP config rules and is not allowing any other URL without prior approval from the network. This would break any flow running because the request would be coming from a new site and would be blocked.

This scenario can happen to Gateway connections especially. As it could be configured to interact with your local cloud.  It will also affect to US Government customers as it has strict URL policies.


So how do you know whether you will be affected by it or not?

There is a paragraph where Microsoft has mentioned that the image in the beginning of the post will be in red color if you are affected. This means you will be facing errors in your flow once the URL change will be implemented.

The following table lists the services to which Power Automate connects. Ensure none of these services are blocked on your network.

Domains

Protocols

Uses

management.azure.com

https

Access to the Azure Resource Manager.

login.microsoft.com
login.windows.net
login.microsoftonline.com
login.live.com
secure.aadcdn.microsoftonline-p.com

https

Access to authentication and authorization endpoints.

graph.microsoft.com

https

Access to Microsoft graph - for getting user information such as a profile photo.

*.azure-apim.net

https

Access to the Runtime for Connectors.

*.flow.microsoft.com

https

Access to the Power Automate site.

*.powerautomate.com

https

Access to Power Automate site.

*.powerapps.com

https

Access to the Power Apps site.

*.azureedge.net

https

Access to the Power Automate CDN.

nps.onyx.azure.net

https

Access to NPS (Net Promoter Score).

webshell.suite.office.com

https

Access to Office for header and search. Please see the Office 365 urls and ranges for more details.

*.dynamics.com

https

Access to Dataverse tables

go.microsoft.com

https

Access to the Power Automate to check for updates

download.microsoft.com

https

Access to the Power Automate to check for updates

login.partner.microsoftonline.cn

https

Access to the Power Automate for desktop cloud discovery


Note

It is not necessary that you see red flags on Power Automate home as per my understanding.  This depends on Microsoft and Your company agreement and if your company has not provided access to your network detection, you may not see this red flag.


For more details, please refer to below link:

·         Power Automate IP address configuration


This change is scheduled for the end of June as per the article. Microsoft has only initiated new sites yet. But once they release the changes, sooner or later they will block the old URL. Before that Microsoft might change the banner's color or shoot an email thread. If you want to be prepared in advance you can perform the check on IP configuration. If you still face the issue, you can always generate a ticket with Microsoft for the same.


Reference:

https://powerautomate.microsoft.com/en-us/blog/flow-microsoft-com-is-moving-to-make-powerautomate-com/

Sunday, 14 November 2021

Set up SharePoint Designer 2013 Step By Step Part 6

 SharePoint Designer 2013 – a tool that is most useful few years back, still handy in some projects, and that still gives me trouble when need to set up for any new machine. So, here is a set up process that I believe can be helpful in future.

Here is order of installation we are going to follow in this article:


If you miss any previous post, you can visit using the above links. 

In this blog we are going to install Update for Microsoft SharePoint Designer 2013 (kb3114721) and verify the working. 


·         Update for Microsoft SharePoint Designer 2013

o   spd2013-kb3114721-fullfile-x64-glb.exe
https://www.microsoft.com/en-us/download/details.aspx?id=53389

o   spd2013-kb3114721-fullfile-x86-glb.exe
https://www.microsoft.com/en-us/download/details.aspx?id=53364

o   Double click on “spd2013-kb3114721-fullfile-x64-glb.exe” file to install the security update.

o   It will open the License agreement dialog. Read the terms and click on “Click here to accept the Microsoft Software License Term”. Once checked, continue button will be enabled. Click on Continue button.


o   It will install the update. It may take few minutes to complete this.

o   Click Ok once completed.


This will complete the full installation of SharePoint Designer 2013 with all the security updates required.

To verify the correct installation, follow below steps:

  • Start SharePoint Designer.
  • Open SharePoint Site where you have SharePoint Designer 2013 Workflow.


  • Provide URL of the site. It will ask you to sign in. Provide credential to login in to site.


  • Go to Workflows tab.


  • It will list OOTB and custom workflows.


  • Open your custom SharePoint 2013 workflow by right clicking on name and then clicking edit workflow.

  • It will open the workflow in edit mode.


Reference –
https://sharepoint.stackexchange.com/questions/218892/error-server-side-activities-have-been-updated-you-need-to-restart-sharepoint-d


Sunday, 7 November 2021

Set up SharePoint Designer 2013 Step By Step Part 5

SharePoint Designer 2013 – a tool that is most useful few years back, still handy in some projects, and that still gives me trouble when need to set up for any new machine. So, here is a set up process that I believe can be helpful in future.

Here is order of installation we are going to follow in this article:


If you miss any previous post, you can visit using the above links. 

In this blog we are going to Update for Microsoft SharePoint Designer 2013.


  • Update for Microsoft SharePoint Designer 2013 (kb3114337)
This update is helpful to fix error - Server-side activities have been updated. You need to restart SharePoint Designer to use the updated version of activities.


o   spd2013-kb3114337-fullfile-x64-glb.exe
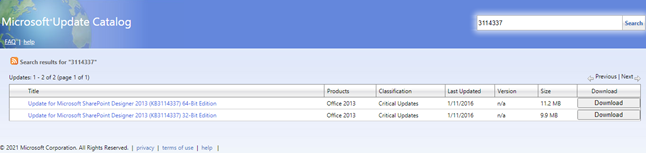
https://www.catalog.update.microsoft.com/Search.aspx?q=3114337

Direct link - http://download.windowsupdate.com/d/msdownload/update/software/crup/2016/01/spd-x-none_7c1009a5a70cac8d7012a44d2710faf79d7d7fb5.cab

o   spd2013-kb3114337-fullfile-x86-glb.exe
https://www.catalog.update.microsoft.com/Search.aspx?q=3114337

Direct link - http://download.windowsupdate.com/d/msdownload/update/software/crup/2016/01/spd-x-none_54fcb6afdc9f1f8daa26eaa10613902bcb6f3685.cab


o   Extract the .Cab file.

o   Double click on “spd-x-none.msp” file to install update.

o   It will complete the installation within a minute. It will not provide any completion dialog.


Sunday, 31 October 2021

Set up SharePoint Designer 2013 Step By Step Part 4

SharePoint Designer 2013 – a tool that is most useful few years back, still handy in some projects, and that still gives me trouble when need to set up for any new machine. So, here is a set up process that I believe can be helpful in future.


Here is order of installation we are going to follow in this article:

If you miss any previous post, you can visit using the above links. 

In this blog we are going to install Security update for Microsoft SharePoint Designer 2013 (kb2863836).


  • It will install the update. It may take few minutes to install.
  • Once installation is completed, click ok.


In next blog we will install pending security updates

Thursday, 23 September 2021

Set up SharePoint Designer 2013 Step By Step Part 3

SharePoint Designer 2013 – a tool that is most useful few years back, still handy in some projects, and that still gives me trouble when need to set up for any new machine. So, here is a set up process that I believe can be helpful in future.

Here is order of installation we are going to follow in this article:

  • Pre-requisite Installation 
  • SharePoint Designer 2013 
  • Service Pack 1 (This Blog)
  • Security Update for Microsoft SharePoint Designer 2013 (kb2863836) (This Blog)
  • Update for Microsoft SharePoint Designer 2013 (kb3114337)
  • Update for Microsoft SharePoint Designer 2013 (kb3114721)
If you miss any previous post, you can visit using the above link:

In this blog we are going to install Service Pack 1.


Once the SharePoint designer 2013 is installed, we need to install Service Pack 1 and other updates. Without this I face blank workflow open or workflow not open issues.

  • Double click on “spdsp2013-kb2817441-fullfile-x64-en-us.exe” to start installation.
  • It will ask to read the License terms and accept it.
  • Check the “Click here to accept the Microsoft Software License Terms” checkbox after reading the terms. It will enable continue button.
  • Click the “Continue” button.

  • It will start installation of Service pack 1. It may take couple of minutes to install.
  • Once installation is done, click ok.


Once the Service Pack 1 installation is done,  we need to install Security Update for Microsoft SharePoint Designer 2013. 

  • Double click on “spd2013-kb2863836-fullfile-x64-glb.exe” to install the update.
  • It will open dialog to show terms.
  • Click on “Click here to accept the Microsoft Software License Term” after reading the terms. Once checked, continue button will be enabled.
  • Click continue.


  • It will install the update. It may take few minutes to install.
  • Once installation is completed, click ok.


In the next blog, we will complete the set up with pending two updates. 

Set up SharePoint Designer 2013 Step By Step Part 2

SharePoint Designer 2013 – a tool that is most useful few years back, still handy in some projects, and that still gives me trouble when need to set up for any new machine. So, here is a set up process that I believe can be helpful in future.

Here is order of installation we are going to follow in this article:

  • Pre-requisite Installation 
  • SharePoint Designer 2013 (This Blog)
  • Service Pack 1
  • Security Update for Microsoft SharePoint Designer 2013 (kb2863836)
  • Update for Microsoft SharePoint Designer 2013 (kb3114337)
  • Update for Microsoft SharePoint Designer 2013 (kb3114721)

If you miss any previous post, you can visit using the above link:

In this blog we are going to install SharePoint Designer:

Follow below steps to install the SharePoint Designer 2013. For this blog, I will use 64 Bit download:

  • Double Click on “sharepointdesigner2013_64bit.exe” file to start the installation.
  • It will extract the files first.


  • Once extraction is done, it will open Installation wizard. Click “Install Now”.


  • It will install the designer in the system. This may take couple of minutes.
  • Once installation is done, click close to complete installation.


In the next part we will install Service Pack 1.

Set up SharePoint Designer 2013 Step By Step Part 1

SharePoint Designer 2013 – a tool that is most useful few years back, still handy in some projects, and that still gives me trouble when need to set up for any new machine. So, here is a set up process that I believe can be helpful in future.


Here is order of installation we are going to follow in this article:
  • Pre-requisite Installation (This Blog)
    • Service pack 1 for .Net Framework 3.0
  • SharePoint Designer 2013
  • Service Pack 1
  • Security Update for Microsoft SharePoint Designer 2013 (kb2863836)
  • Update for Microsoft SharePoint Designer 2013 (kb3114337)
  • Update for Microsoft SharePoint Designer 2013 (kb3114721)
In this blog we are going to install Pre-requisites:

This will save you from error - Windows workflow Foundation, part of .Net Framework 3.0 must be installed to use this feature.


  • When you start installation, it will take a moment to identify the features to be install. Click “Download and install feature”.


  • Once installation complete, click close.


We are done with Pre-requisites. We will start the SharePoint Designer Installation in next part.


Sunday, 11 July 2021

Error - manage web site permission issue while creating site collection level app catalog

 Recently, we were deploying a solution for a client. So for UAT set up, we asked them to create a site collection and activate the site collection level app catalog. The IT admin create the site collection and when he ran below command for creating site collection level app catalog.


 Connect-SPOService -Url https://Domain-admin.sharepoint.com/   
 New-SPOSite -Url https://contoso.sharepoint.com/sites/mynewuatsite -Owner user@domain.com -Title "My new site collection"   
 $site = Get-SPOSite https://Domain.sharepoint.com/sites/mynewuatsite   
 Add-SPOSiteCollectionAppCatalog -Site $site  

He faced an error:

add-spositecollectionappcatalog : Must have Manage Web Site permissions or be a tenant admin in order to add or remove sites from the site collection app catalog allow list


As the site collection creation didn't give an error, it was sure that he has SharePoint admin access. So, why the site collection level app catalog is giving error.

So, we go to analysis mode and we found out below reason.

Solution:

So, I found out a community discussion on the google about the same issue. Please see reference link for the same. 

As per that discussion, user must has site collection admin rights on the Tenant level app catalog to create site collection level app catalog with SharePoint Admin rights. 

Once we provided that access, we were able to run the command successfully.

Reference:

  • https://github.com/SharePoint/sp-dev-docs/issues/1348


Saturday, 22 May 2021

How to start User Profile Service stuck on Starting or Stopping stage

Issue:

Recently, we have requirement to change the farm admin account due to some issue with user. We have changed the user but it broke the User Profile Service. The issue we face is that when we start it, it stuck on Starting. If we try to stop then it stuck on stopping. 

Solution:

So, finally I can across PowerShell script that is working for me that starts & stops user profile and user profile synchronisation service. 

  • To stop the service, run using powershell command for user profile service,

 stsadm -o provisionservice -action stop -servicetype “Microsoft.Office.Server.Administration.UserProfileService, Microsoft.Office.Server.UserProfiles, Version=14.0.0.0, Culture=neutral, PublicKeyToken=71e9bce111e9429c” -servicename  

  •   To stop the service, run using powershell command for user profile synchronization service,

 stsadm -o provisionservice -action stop -servicetype “Microsoft.Office.Server.Administration.UserProfileService, Microsoft.Office.Server.UserProfiles, Version=14.0.0.0, Culture=neutral, PublicKeyToken=71e9bce111e9429c” -servicename FIMSynchronizationService  

Now to start the service, you just need to change the action parameter to start in above powershell command.

  • To start the service, run using powershell command for user profile service,

 stsadm -o provisionservice -action start -servicetype “Microsoft.Office.Server.Administration.UserProfileService, Microsoft.Office.Server.UserProfiles, Version=14.0.0.0, Culture=neutral, PublicKeyToken=71e9bce111e9429c” -servicename  

  • To start the service, run using powershell command for user profile synchronization service,

 stsadm -o provisionservice -action start -servicetype “Microsoft.Office.Server.Administration.UserProfileService, Microsoft.Office.Server.UserProfiles, Version=14.0.0.0, Culture=neutral, PublicKeyToken=71e9bce111e9429c” -servicename FIMSynchronizationService  

Reference:

  • http://sharepointhyfy.blogspot.com/2016/04/user-profile-service-stuck-in.html#gsc.tab=0
  • https://social.technet.microsoft.com/wiki/contents/articles/26067.sharepoint-2013-user-profile-stuck-stopping.aspx

Wednesday, 31 March 2021

SharePoint 2019 FBA Set up Full Name Error

Recently we have set up Form based authentication (FBA) in SharePoint 2019 environment. We have configured the FBA with best practice but when we try to login using windows user or FBA user,  we were getting error – “Fullname”. 

Issue:

We faced below error when we try to login using windows user or FBA user:


Solution:

We have checked multiple blogs in google and verified that the set up was done using best practice. So, our doubt goes to configuration in web application, and we found out that “Client Integration” settings is responsible for this.

To disable the “Client Integration” settings follow below steps:

  • Go to Central Admin.
  • Click “Manage web application” under “Application Management”


  • Select your web application.


  • Click on “Authentication provider” from Ribbon. 


  • It will show default Zone. Click on that. 


  • Scroll bottom of the authentication provider settings dialog.
  • Click “No” for “Client Integration” Settings. 


  • Click Save.
  • It will take some time and provide below dialog. Click close.

  • Now try to login in web application. You will see the user is able to login successfully.


SharePoint Server 2016 and 2019 Retirement: What IT Professionals Need to Know

Microsoft SharePoint Server 2016 and 2019 are reaching end of support on July 14, 2026. With the April 2026 feature retirement deadline now ...